Smart ATX Power Supply
ESP32 ·Welcome to the first post here! This project uses an ESP32 wifi enabled microcontroller to mimic a Philips Hue device using the FauxmoESP library to turn on an ATX power supply. It basically lets you control the power supply using the Alexa suite of devices.
ATX power supplies power most desktop computers. They are pretty easy to find for free in old computers, provide several voltage outputs, have built in smart short circuit protection, lots of current capability, and the output is very clean. They are great for powering things like LED strips, 12V car devices, custom projects, and lots more.
Gear Needed
- ESP32 Boards
- An ATX Power Supply
- Alexa enabled device like the Echo
- Wifi Network
Programming Environment Setup
A good introduction to the ESP32 board can be found at the Random Nerd Tutorials website.
RNT Getting Started with ESP32
Follow the guide for setting up the Arduino environment and board on RNT site.
Mac and Linux Install
Windows Install
Now you need to install the FauxMoESP library.
The Fauxmo library documentation, examples and downloads are here:
FauxMoESP
For a shortcut, you can download the FauxMo ESP32 Library directly from here:
AsyncTCP Github
To install:
- Click on Clone/Download button and chose download as a zip
- Clean up the zip file name to remove the branch name
- In the arduino IDE go to Sketch>Import Library>Add Library…
- Select the AsyncTCP zip file you downloaded
If you are interested in reading more about using the ESP32 to mimic a Philips Hue bulb, this article is very helpful. This project will not be following these steps but it’s still good background knowledge.
Code
I have shared my code on my github here:
Miswired Github
There are three items you need to modify in the code. Credentials.h has two definitions for your wifi SSID and password
#define WIFI_SSID "yournetworkname"
#define WIFI_PASS "yourpassword"
You also need to update the name you want the device to show up as by modifying the following in fauxmoESP_ATX_Control.ino
//Put the name you want the device to be registered as here
#define LIGHT_NAME "pick a name"
The code will also print out debugging data on the serial monitor in the Arduino IDE if you want to use it for debugging. The default baud is 115200 so be sure your monitor window is updated.
Wiring

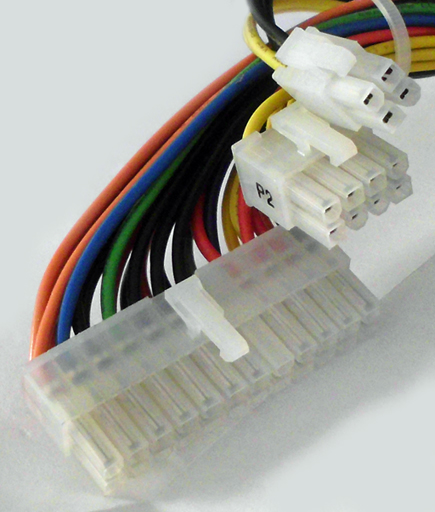
You can test your power supply by shorting the green control wire to one of the black ground wires. The power supply should then turn on and you should see the following voltages:
- Orange: 3.3V
- Red: 5V
- Yellow: 12V
There are other voltages available on ATX power supplies but they don’t provide much current (-12V, -5V).
Now here is the trick, the power supply is off until this line is grounded, but the ESP needs power to get the command to turn the power supply on. Luckily there is a +5V VSB (+5V Standby) that is always powered on and has enough current capability to run our board.
The ESP32 has an onboard regulator that can convert the +5V source to it’s 3.3V operating voltage. So you need to make the following connections.
Vin (Pin1) = +5VSB (Pin 9, Violet Wire)
GND (Pin2) = GND (Pin19, (Many options) Black Wire)
Control (Pin18) = PS_ON (Pin 16, Green Wire)
Note that the control pin can be changed to many of the GPIO pins on the ESP32. This is the default pin the program is connected to.
Setting up your Echo or other Alexa enabled device to control it
At this point it should behave like a Phillips Hue light, so go into the alexa app and have it discover new devices. The nice thing about the FauxMo library is it doesn’t require the use of a server and can be discovered on the local network directly by the echo devices. You should now be able to tell it to turn on and off. Have fun!